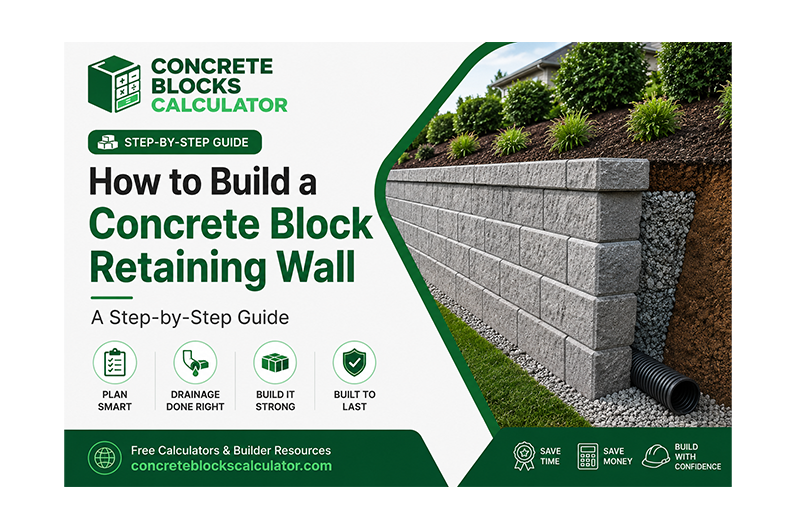
How to Build a Concrete Block Retaining Wall: A Step-by-Step Guide
When Do You Actually Need a Retaining Wall?
A concrete block retaining wall — also called a Segmental Retaining Wall (SRW) or CMU retaining wall — is a structural system designed to hold back soil, prevent erosion, and create flat, usable terraces on sloped properties. Unlike decorative garden walls, these are load-bearing structures built to resist significant lateral earth pressure and hydrostatic pressure from groundwater — so the engineering behind them matters a lot more than most people initially expect.
You need a retaining wall if:
- Your yard has a slope greater than 3:1 (3 feet of run for every 1 foot of rise)
- You’re experiencing soil erosion, hillside slippage, or mudslides on your property
- You want to create level garden beds, patios, or driveways on sloped land
- A road, driveway, or structure is cut into a hillside
- You’re managing stormwater runoff that keeps shifting your soil
Why Concrete Blocks Are the Top Choice
This comes up constantly, so let’s clear up the confusion before anything else. True cinder blocks are made with coal ash aggregate — they’re lighter but carry lower compressive strength, sitting around 1,900 psi. Concrete masonry units (CMUs), what most people call cinder blocks today, are made with Portland cement and sand or gravel aggregate, pushing compressive strength to 2,500 psi or higher. For a retaining wall holding back significant soil pressure, CMUs are the correct choice — they accept rebar, can be grouted solid, and are engineered to handle lateral load in a way that older, lighter cinder blocks simply are not.
| Factor | Concrete Blocks (CMU) | Poured Concrete | Timber / Railroad Ties | Natural Stone |
|---|---|---|---|---|
| DIY Friendly | ✅ High | ❌ Low | ⚠️ Medium | ❌ Low |
| Cost (per linear ft) | $15–$35 | $40–$80 | $10–$20 | $50–$120 |
| Lifespan | 50–100 yrs | 50–100 yrs | 10–20 yrs | 100+ yrs |
| Drainage | Easy | Requires weep holes | Natural | Natural |
| DIY Height Limit | Up to 4 ft | Any (with engineering) | 3–4 ft | 3 ft |
| Permit Required | Usually above 4 ft | Always | Usually above 3 ft | Usually above 3 ft |
Concrete masonry units offer the best combination of strength, cost-effectiveness, and DIY-friendliness for most residential retaining walls — which is why they dominate the market for this application.
Here’s the key stat most guides skip:
- the number 1 cause of retaining wall failure in the U.S. is inadequate drainage, not structural weakness.
- Most DIY walls fail not because of poor block quality but because water saturates the soil behind the wall and creates 2–3× the intended lateral pressure.
- And for a small decorative divider, garden border, or DIY cinder block fence under 3 feet, either block type works fine — but for anything retaining soil, always use concrete masonry units.
Watch: Complete DIY Retaining Wall Build (Pro Tutorial)
Phase 1 – Planning, Permits & Block Selection
Before You Dig: Call 811 and Check Your Permits
Call before you dig
In the United States, it is legally required to Call 811 (Dig Safe) at least 3 business days before any excavation — this is the one step that genuinely cannot be skipped. The free service marks all underground utilities including gas, water, electric, and fiber lines in your area, and it only takes about two minutes to arrange. Hitting a line can be fatal and result in massive fines, so call two to three business days ahead and get your public utilities marked before a single shovel goes in the ground.
If you’re building a retaining wall over 36″ in height, you may also need to obtain a building permit as required by your local municipality. This step exists for good reason: taller walls carry a higher risk of failure, posing real potential hazards to your property and the people around it. A permitted wall is a wall that safely complies with local regulations, and some walls over 4 feet tall could require professional engineering on top of the permit. Check your local codes early to find out exactly what permits and engineering your particular wall will need before you order a single block.
Do You Need a Permit for a Retaining Wall?
This varies by state and municipality, but here’s a general U.S. rule of thumb:
- a wall under 3 feet usually has no permit required in most jurisdictions
- a wall 3–4 feet has a permit often required, so check your local codes
- a wall over 4 feet almost always requires a permit and a licensed structural engineer’s stamp
- If your wall sits near a property line, setback requirements may apply — check your HOA rules before breaking ground
- And for any walls supporting a surcharge like a driveway or structure above, always get an engineer involved, full stop
Step 1: Plan Your Layout Before You Build
Plan for height honestly before you do anything else:
- A single reinforced cinder block wall is reliably buildable to 3–4 feet by a skilled DIYer
- Walls from 4–6 feet require engineering consideration and typically professional installation
- Anything taller should be designed by an engineer — the consequences of failure at height are serious and not worth cutting corners on
Once height is settled:
- Use stakes and mason’s string to outline the wall footprint
- For curves, lay a garden hose in the desired shape, then mark it with spray paint so you have a clean line to follow
- Measure your total linear feet and maximum wall height — you’ll need both for the material estimator
- Plan for a 1-inch setback per course (batter) — most SRW blocks build this in automatically
- Keep in mind that the wall footprint extends 1 ft below grade for every foot of finished wall height, so factor in that burial depth when calculating your excavation
Step-by-Step Construction Guide
Step 1: Mark Layout & Excavate the Site
Once you secure your building permit and are ready to build, start laying out exactly where your retaining wall will go. Mark your layout using grade stakes, mason’s string, and marking paint to clearly define the entire wall footprint and map out the area.
Marking the Footprint
- For straight walls, run two parallel string lines to define the front face and back edge.
- For curved walls, lay a garden hose in the shape you want, then trace it with spray paint.
This gives you a clean, visible line to follow throughout the dig.
Excavating
Use the excavation depth formula to find your trench depth:
Trench depth = block height × 2 + 6–8″ of gravel base Example: with 6″ blocks you’d bury one full course (6″) plus 6–8″ of gravel, giving a total trench depth of 12–14″.
- For small walls under 20 ft and 3 ft height, hand tools and a shovel work fine for low walls.
- For larger projects, rent a mini-excavator, skid steer, tractor, or mini skid steer — it’s worth every penny and a machine may be required for anything serious.
Cutting Back the Hillside
For walls over 3 ft tall, you must cut back into the hillside as far back as your wall is tall — this cutting back creates space for the drainage zone and geogrid layers.
- A 4 ft wall requires a 4 ft cut-back behind the wall face, and a 4ft wall means cut 4ft behind the wall — same rule, no exceptions.
⚠️ Never build on a slope. The wall base must be level, so step your footing trench up or down as needed to ensure the first course is always horizontal, even when the terrain slopes along the wall’s length. Always cut out a level spot where the wall will go before laying anything down.
Prepare the Footing — The Foundation of Everything
Your wall is only as strong as the foundation it sits on, and skipping or rushing the footing is the number 2 cause of retaining wall failure right after poor drainage. After excavation, lay out the wall location again on your new grade, then dig a trench for your footing. The footing should be 16in wide (or at least 16″ — twice your block depth, depending on your block size) with 6-8in of compacted crushed gravel in the base. The depth of the trench must also include the height of one full row of blocks that will be buried below the finished grade — so if your blocks are 6in tall, your footing trench should be 12-14″ deep.
Once the gravel is in, compact thoroughly using a plate compactor or hand tamper, making multiple passes to build real gravel density. Then check level with a 4-foot level in all directions and adjust before adding blocks — side to side and front to back, the finished footing must be level with no exceptions. Also install filter fabric below the footing if you haven’t already, to help prevent future settling.
Set the First Course —
The Most Critical Step
The first course of blocks is the single most important step in the entire project — and the most important course in the entire wall. Every subsequent course stacks directly on top, so errors multiply with every layer. There is really no adjustment of rows once you get going, which is why you need to take your time and get this one perfect — it will make the rest of the project go a lot smoother. Snap a chalk line on the cured footing to mark the face of the wall, then dry-fit the entire first course before mortaring to confirm spacing and alignment.
Spending an extra hour perfecting the first course will save you hours of frustration and structural problems on every subsequent course above it, since every course above inherits whatever error exists in the first.
Spending an extra hour perfecting the first course will save you hours of frustration and structural problems on every subsequent course above it, since every course above inherits whatever error exists in the first.
If your terrain slopes along the length of the wall, you’ll need to step your first course — think of it like stair-stepping, where each step is one block height. Keep a string line at constant elevation along the wall face as your reference so the level plane stays perfectly consistent even as the terrain drops. This is what separates a wall that perfectly holds over time from one that shifts in the first season.
Install the Drainage System — Don’t Skip This
Drainage is not optional on a retaining wall — water pressure behind the wall is what causes bulging, cracking, and sudden collapse. This step is installed as you build, not after. Most DIYers underestimate or skip it entirely, which is the primary reason retaining walls lean, crack, and collapse over time. Without a way for water to escape, it will saturate the soil, create an excess surcharge on your wall, and result in failure.
Here’s the physics behind it: saturated soil behind a wall can weigh up to 120 lbs/cubic foot compared to dry soil at around 95 lbs/cubic foot. Add hydrostatic water pressure on top of that, and a saturated wall can experience 2–3× the design lateral load, causing even well-built walls to fail. Proper drainage is your structural insurance policy — there’s no workaround.
- Place a 4 inch perforated drain line behind the first course of block that leads out to daylight so water can drain freely
- Install non-woven filter fabric below the pipe and up the back of the hillside to prevent silt and soil from clogging drainage stone
- Use non-woven geotextile — the only option that genuinely allows water through while filtering fines
- Use woven filter fabric — it creates hydrostatic pressure by not allowing enough water to pass through, essentially creating a dam
- Use woven landscape fabric in the drainage zone — it relieves no pressure and will make the whole system useless over time
As the wall rises, continue filling the zone immediately behind the blocks with gravel, not native soil. Install weep holes every 4 feet along the wall face to allow any water that does reach the wall face to escape rather than build pressure behind it. Cover the pipe zone with washed 3/4″ clean stone all the way up as you go.
Stack Courses 2+ — Proper Block Staggering & Batter
With drainage installed and the first course perfect, you can begin stacking. The rhythm is simple: lay blocks → check level → backfill & compact → repeat.
Each course must be offset by half a block length from the course below — this is called a running bond or running bond pattern, and it creates the interlocking structure that gives the wall its strength.
Cut Blocks for Corners, Curves & End Pieces
You’ll inevitably need to cut blocks for wall ends, corners, curves, end pieces, and stagger adjustments — and when you reach the end of the retaining wall, you’ll use a masonry saw to cut blocks to fit as needed, depending on the shape of the wall.
In some cases you may only need to cut a single block — a masonry chisel and small sledge hammer work fine for that, or you can use a masonry diamond cutting blade on an angle grinder or concrete saw. Whichever method you choose, take proper precautions to avoid concrete dust, since it is genuinely harmful — cutting concrete blocks generates crystalline silica dust, a serious respiratory hazard that causes silicosis with repeated exposure.
Crystalline silica dust causes silicosis — an irreversible lung disease — with repeated exposure. This is not a minor precaution. Treat it with the same seriousness as working at height.
Install Geogrid Reinforcement (Walls Over 3 Feet)
For walls over 3–4 feet in height, or walls supporting poor soil, you will need to install geogrid to reinforce the wall by stabilizing the ground behind it.
Geogrid is a high-strength polymer mesh material — brands like Mirafi, Tensar, or equivalent — that is buried in horizontal layers behind the wall. It works by mechanically stabilizing the soil wedge behind the wall, essentially creating a reinforced mass of earth that acts as a counterweight against the lateral forces pushing on the wall. By installing geogrid, the unstable wedge of soil behind the wall is stabilized, the angle of repose is moved back into the hillside, and your wall is relieved of that added pressure.
For retaining walls, use uniaxial geogrid and roll out your geogrid so the strong axis runs perpendicular to the wall face, extending back into the hillside with the strength going back into the hillside — this is what gives the system its holding power. If not stabilized, the back pressure will result in failure.
Every soil type has an angle of repose — the natural angle at which soil wants to settle if unsupported, typically between 25°–45°. Behind a retaining wall, this essentially creates a wedge of unstable soil pushing against the wall face and generating back pressure on the wall when the wall is not present to contain it.
Geogrid moves the effective failure plane from directly behind the wall to deep within the reinforced earth mass, dramatically reducing the lateral load on the wall face and turning what would be a failure point into a stable, reinforced structure.
Complete Backfilling & Compaction
Once the wall reaches full height (minus the cap course), it’s time to complete backfilling in lifts. The final step is to backfill the wall with clear ¾” stone gravel to prevent the drainage zone from getting clogged with soil, which can result in frost and movement issues. After all the coping has been cut and glued into place with concrete adhesive, line the embankment behind the retaining wall with landscape fabric to separate the soil embankment from the granular backfill used behind the wall.
Think of the area behind the wall in three zones:
Install Cap Blocks & Adhesive
The cap (or coping) course is the top row — it’s the finished face of your wall, the most visible element, and the thing that prevents water from infiltrating the top of the wall. Start by cleaning the top course of blocks thoroughly — remove all dust, debris, and loose material before anything goes down. Apply a full mortar bed to the top course, then set the cap blocks with a slight pitch back toward the retained soil so the surface sheds water away from the wall rather than pooling on top. Once cap blocks are in position, tool all joints with a concave jointer while the mortar is thumbprint firm — pressed but not left with a mark.
Final Grading, Landscaping & Inspection
-
Groundcovers, perennial flowers, and low shrubs — an excellent choice. Their roots help bind surface soil and add stability without adding pressure.
-
Ornamental grasses — good too, thanks to their shallow root systems.
-
Small shrubs — acceptable for walls under 4 ft, but use caution. Caution — walls under 4 ft only
-
Trees or large shrubs — root expansion exerts enormous lateral pressure on the structure. Never — on any retaining wall
-
Root water uptake disrupts soil moisture dramatically, destabilising the backfill zone over time.
-
The added dynamic pressure from large growing roots and swaying trees can be genuinely detrimental to your wall over time.
Cost Breakdown & Budget Guide
SRW Blocks ~100 units | $250–$350 |
Crushed Gravel 2 tons | $80–$120 |
Drain Pipe & Fittings perforated + outlet | $40–$80 |
Filter Fabric non-woven geotextile | $25–$50 |
Geogrid 1 layer | $60–$100 |
Cap Blocks & Adhesive finishing course | $40–$80 |
Tool Rentals plate compactor, etc. | $75–$150 |
Permits & Misc varies by jurisdiction | $75–$200 |
For DIY cinder block retaining wall builds, materials run $4–$20 per square foot depending on height and reinforcement requirements. Add equipment rental — a plate compactor, mixer, and other gear — for another $100–$300. A simple 20-foot by 3-foot garden retaining wall can be completed in materials for $800–$1,500 total.
Professional installation of cinder block retaining walls costs $20–$35 per square foot for walls 3–4 feet tall, rising to $35–$65 per square foot for walls 4–6 feet with full engineered reinforcement, drainage, and footing included. A professionally built 30-foot, 4-foot wall in the Chicago area typically runs $4,000–$9,000 fully installed, with labor at $30–$75 per hour.
Mistakes That Destroy Retaining Walls
Water builds up behind the wall, saturates the soil, triples the lateral pressure, and the wall falls.
Always install perforated pipe and gravel behind the wall from day one, and always drain to daylight.
Setting blocks directly on soil without a gravel footing causes uneven settling and wall lean over time.
Always dig a trench and compact 6–8″ of gravel first.
Every subsequent course gets worse from a bad start. Rushing the cure — working on a partially cured footing or grouting too soon — causes settling and misalignment that cannot be corrected after the fact.
Spend extra time on the first course — it’s the one step where patience genuinely pays off. Let things set properly before moving on.
Using regular dirt: native clay soil in the drainage zone clogs the gravel and creates hydrostatic pressure. Woven landscape fabric restricts water flow and acts as a dam. A plate compactor within 3 ft of the wall face can push it over during construction.
Use clean 3/4″ washed gravel in the drainage zone. Use non-woven geotextile only. Hand tamp within 3 ft and use the plate compactor only beyond that zone.
Gravity alone can’t resist the soil wedge pressure. Building on unstable soil — expansive clay, loose fill, or organic material — without a proper soil assessment leads to differential settling that no cap block or adhesive can fix.
Geogrid is not optional above 3 ft. Test your soil type first, before a single block goes in the ground.
A perfectly vertical retaining wall has a much smaller margin of safety against overturning than one with even 3/4 inch of back-set per course. Aligned vertical seams become a structural fault line that propagates under load.
Always set each course back into the hillside. Always stagger joints — never let vertical seams align between courses.
Root growth and moisture fluctuation from large plants creates dynamic pressure the wall wasn’t designed for.
Use groundcovers only above retaining walls and keep the load light.
DIY or Professional? The Honest Answer in 2026
In the Chicago area, clay-heavy soils mean most retaining applications above 2–3 feet are firmly in professional territory — and that’s the honest answer for 2026.