How Long Does Concrete Take to Dry? Curing Time Guide
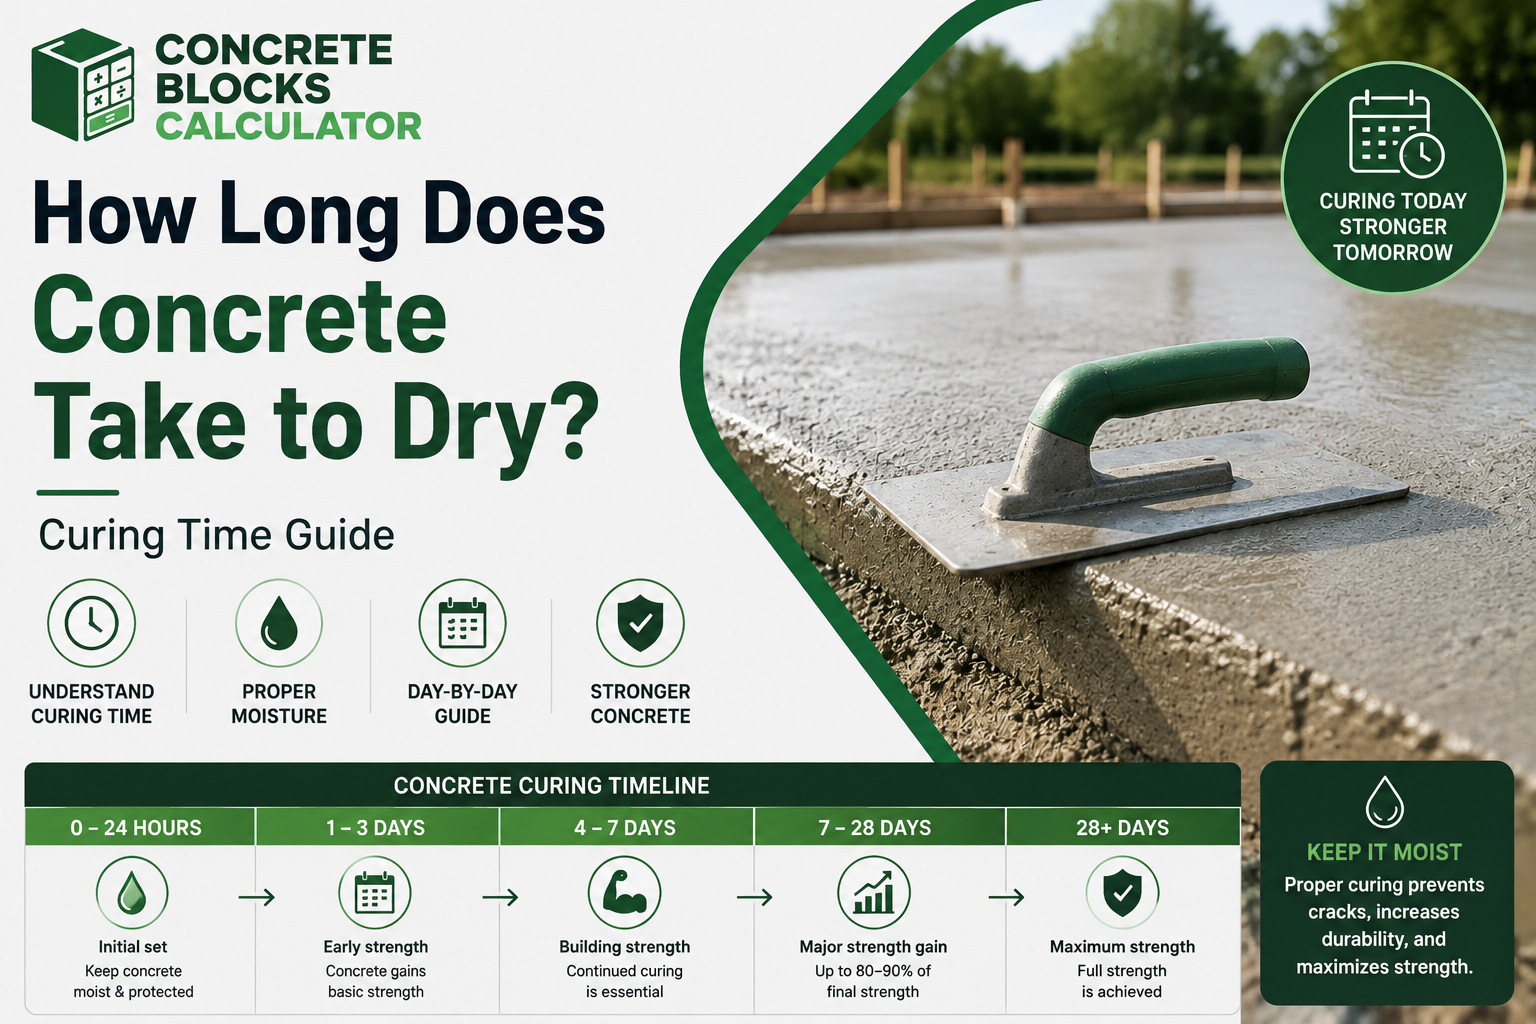
Concrete doesn’t just “dry” — it hardens through a chemical reaction called hydration that takes weeks, not hours. For a typical residential mix: safe for light foot traffic after 24–48 hours, ready for passenger vehicles after ~7 days (~70% strength), and reaches full design strength at 28 days. Curing conditions — moisture, temperature, and slab thickness — control how fast and how well that happens.
📋 In This Guide
- What Every Installer Needs to Know First
- How Long Does Concrete Take to Dry?
- Drying vs. Curing: What’s the Difference?
- Concrete Drying and Curing Timeline
- Factors That Affect Drying and Curing Time
- How Weather Affects Concrete Drying Time
- How to Speed Up Concrete Drying
- How to Tell If Concrete Is Dry Enough
- How to Properly Cure Fresh Concrete
- What Happens If Concrete Doesn’t Cure Properly?
- Concrete Drying Time by Application
- 4 Common Myths About Concrete Drying
- Frequently Asked Questions
- Key Takeaways
What Every Installer and Property Manager Needs to Know First
If you work as a concrete flooring installer, you already know that timing is everything — a single misjudgment on concrete drying time can spiral into costly delays, frustrated clients, and real damage to your reputation. But concrete does not simply dry the way most people picture it. It hardens through a chemical reaction called hydration, and that process plays out over weeks, not hours. For a residential mix, the general benchmarks hold like this: newly poured concrete is firm enough to walk on its surface after 24 to 48 hours, ready to carry passenger vehicles after about 7 days — when it has reached roughly 70% strength — and hits its full design strength at 28 days. The old rule of thumb you have probably heard — 28 days per inch of slab thickness — is a starting point, but real projects rarely run on starting points alone.
What actually controls how fast or slow your slab moves through that curve are the curing conditions on site: moisture, temperature, humidity, and slab composition all pull in different directions at once. The cement in the mix is the binding ingredient — cement particles, sand, and aggregate all bind with water in the concrete mix as the slab hardens. Once that slab has hardened and been tested as dry enough to receive a floor covering or coating, it still needs to meet a specific moisture tolerance threshold — typically 4.5%, 4%, or 3.5% depending on the flooring coating or covering and the manufacturer’s specifications. For concrete and cementitious screeds to properly receive a floor covering, the base must be suitably dry enough to prevent damage to the flooring material and to ensure a proper bond with adhesives. Rushing that stage — cutting through the curing and drying process before accurate testing methods confirm it is ready — is exactly what leads to flooring failures like moisture-related adhesive breakdown, warping, and mold growth.
For commercial property managers, construction and maintenance projects run into the same challenge: the misconception that concrete is ready once it feels hard to the touch, capable of carrying full loads or having finishes applied, costs projects time and money. Concrete only reaches its full strength after about 28 days, and multiple factors influence how long it takes to dry and cure properly. Understanding standard drying times at different stages, the factors that shape them, and the practical tips for speeding up drying — without compromising quality — is what lets you manage concrete-related projects efficiently and make informed decisions that keep everything on schedule. That starts with the right testing methods: specifically relative humidity (RH testing), which is the industry standard for getting reliable results on concrete moisture levels.
How Long Does Concrete Take to Dry?
The General Rule — and What It Actually Means on Site
The general rule of thumb for concrete drying is 28 days for every inch of slab thickness — but the clock only runs properly when the conditions are right. Within 24 to 48 hours, a freshly poured slab is typically ready for foot traffic, though that early firmness does not mean the dry cycle is anywhere near complete. To hit that 28 days per inch benchmark reliably, you need low ambient relative humidity and a consistently warm temperature throughout the entire process — which in enclosed or climate-sensitive spaces usually means enclosing the space and running the HVAC to hold those conditions steady.
Drying vs. Curing: What’s the Difference?
What Is Concrete Drying?
Concrete drying refers to the evaporation of free water and excess surface moisture from the concrete surface — the process that makes a new slab appear dry and feel hard within a short period. Under normal temperature and humidity, most slabs are hard enough for light use — foot traffic, outdoor furniture — within 24–48 hours. But surface appearance tells you almost nothing about internal strength or readiness for loading.
What Is Concrete Curing?
Curing is an entirely different process — and the one that actually governs strength. The American Concrete Institute (ACI 308R) defines curing as maintaining satisfactory moisture and temperature in freshly placed concrete long enough for cement hydration to occur and the mix to reach its potential strength and durability. The Portland Cement Association (PCA) describes it the same way: curing strongly influences final strength, permeability, and resistance to freezing and thawing. The hydration reaction between cement and water begins immediately after placement and continues for weeks, building compressive strength, stiffness, and durability the whole time.
Why Curing and Drying Are Not the Same
The key misconception is treating a slab that looks dry as one that is cured or strong enough to load. Internal hydration and strength gain continue long after the surface has dried — most standard mixes reach only about 70% of design strength at 7 days and approximately 100% at 28 days under proper curing. The distinction matters: a slab can look completely dry after a day or two while still far short of sufficient strength for its intended function. Drying and curing are parallel processes — one visible, one structural — and confusing the two is what leads to slabs being loaded, coated, or covered before they are genuinely ready.
| Drying | Curing | |
|---|---|---|
| What it is | Evaporation of free water from the surface | Chemical hydration reaction that builds strength |
| When it’s visible | 24–48 hours (surface looks and feels dry) | Invisible — happens internally over weeks |
| What it controls | Surface appearance and light-use readiness | Compressive strength, stiffness, durability |
| When it’s complete | Can take months for full internal drying | ~28 days for design strength (continues beyond) |
| Why it matters | Flooring/coating installation thresholds | Structural loading, long-term performance |
Concrete Drying and Curing Timeline
The timelines below reflect a standard, non-fast-setting residential mix at 3,000–4,000 psi design strength under normal conditions — roughly 50–85°F with average humidity and no accelerators or retarders added. The general rule of thumb is 28 days per 1 inch of slab thickness, though weather, mix design, and site-specific differences can shift the timeframe of the curing period in either direction. Use these as general guidelines, not fixed guarantees — always check manufacturer’s instructions for your specific concrete mix and account for the unique conditions of your project.
Initial Set
Between two to four hours after the pour — and up to 4–8 hours depending on conditions — concrete reaches its initial set. The mix is still plastic to stiff, meaning it transitions from a workable state to one that is firm enough to hold its shape but still pliable enough to be worked on if needed. During this window, footprints, tools, or rain can all mar the surface permanently. Limited access should be enforced, and depending on design and site conditions, some early formwork removal may be possible, but this stage is primarily about protecting the slab from surface damage during the critical phase right after pouring.
Final Set
After about 24 hours, a standard mix slab reaches its final set — the point at which the concrete is no longer workable and has developed enough early strength to support light foot traffic. The top layer has typically lost its sheen, the surface appears dry, and form removal on simple slabs and edges becomes viable once the slab has hardened and pulled away cleanly. Waiting the full 48 hours before allowing access significantly reduces the risk of scuffing or imprinting, especially for patio and sidewalk applications where surface finish matters. At this stage, heavy loads and heavy equipment should still be kept off — the slab is vulnerable to damage despite its outward appearance. No undue stress or dragging heavy objects across the surface.
24 Hours
At 24 hours, the slab is typically walkable under careful conditions, but the concrete is still gaining strength internally. Cement, aggregate, and water continue their chemical reaction — the mix hardens, becomes porous, and a portion of that water integrates into the matrix while leftover water either evaporates or remains in the capillaries of the slab. For fence posts and mailbox posts using a standard mix, you can attach lightly after 24 hours once firm, but the best practice is to wait several days before applying any real full load. With a fast-setting mix — products like Quikrete Fast-Setting or Sakrete Fast Set — set time runs 30–60 minutes, and light load use is possible in 4–6 hours, making same-day post installation realistic. Safe to walk on at 48 hours for light pedestrian traffic — but patience here prevents long-term issues and surface imperfections that require costly fixes later.
7 Days
At 7 days, concrete has reached approximately 60–70% of its design compressive strength under typical conditions — enough to be safe for passenger cars on a driveway. The minimum curing period per ACI and PCA guidance is at least 7 days at or above 40°F to prevent excessive moisture loss on normal concrete. Vehicle traffic — specifically the weight and stress of normal vehicles — is generally acceptable at this point, though ambient temperature, slab thickness, and project-specific conditions all influence this. Property managers should plan schedules around this milestone to avoid setbacks. Heavier vehicles — trucks, moving vans, RVs — and full structural loads should not be placed on the slab at this stage.
28 Days
28 days is the standard reference age for design strength in the industry. By this point, the curing process that began immediately after the slab was poured has brought the concrete to its full strength and durability. The hydration process has delivered optimal hardness, resistance to wear and tear, and sufficient structural capacity for heavy loads and extreme conditions. This milestone is the common basis for acceptance testing and specification language across the industry, per PCA Design and Control of Concrete Mixtures, ACI 301 minimum curing guidance, NRMCA CIP 11, and Quikrete and Sakrete technical data sheets. Excess water continues to evaporate from the slab — full drying can take months — but structurally, 28 days is the milestone that defines readiness.
When Concrete Reaches Full Design Strength
Slab thickness plays a direct role in how long the timeline extends. A 4-inch slab typically reaches walk-on condition in about 24 hours and full cure at 28 days. A 6-inch slab may need 24–36 hours before foot traffic and 28–35 days for full cure. Slabs 8 inches or thicker may require 7–10 days before safe form removal and 35–45 days for full internal cure, because thicker slabs hold moisture longer and take more time to fully hydrate throughout their depth. Concrete continues to gain strength beyond 28 days if moisture and temperature conditions allow — but this milestone remains the most commonly used reference point.
Concrete Curing Time Chart
| Stage / Use | Typical Time After Pour | Notes |
|---|---|---|
| Initial set | 4–8 hours | Still plastic to stiff; footprints, tools, or rain can mar the surface |
| Surface appears dry | 12–24 hours | Top layer loses its sheen but still gaining strength internally |
| Light foot traffic | 24 hours (wait 48) | Waiting full 48 hours reduces risk of scuffing or imprinting |
| Regular foot traffic / outdoor furniture | 48 hours | Suitable for patio or sidewalk use if curing continues |
| Form removal (simple slabs/edges) | 24–48 hours | Once hardened and pulled from the form |
| Minimum curing period (ACI/PCA) | At least 7 days (≥40°F) | Protects against moisture loss on normal concrete |
| Passenger vehicles on driveway | ~7 days | Reaches roughly 70% design strength — sufficient for normal cars |
| Heavier vehicles / full structural loads | 28 days | Wait for trucks, moving vans, RVs |
| Fence/mailbox posts (standard mix) | ~24 hrs firm; several days for full load | Light attachment after 1 day; cure several days before real loads |
| Fence/mailbox posts (fast-setting mix) | 30–60 min set; 4–6 hrs to light load | Quikrete Fast-Setting / Sakrete Fast Set — same-day installation |
| Fully cured | 28 days | Full strength, durability, optimal hardness, resistance to wear |
Sources: PCA Design and Control of Concrete Mixtures · ACI 301 minimum curing guidance · NRMCA CIP 11 · Quikrete and Sakrete technical data sheets.
Factors That Affect Concrete Drying and Curing Time
Several variables interact to determine concrete drying times on any given project — and property managers, installers, and contractors who understand these factors are far better equipped to make informed decisions about scheduling, construction, and maintenance activities without relying on calendar-based assumptions that introduce uncertainty into construction and QA/QC decisions.
Temperature
Ambient temperature is one of the strongest drivers of curing speed. At moderate temperatures between 50–70°F, conditions are ideal — the pace of early strength gain and long-term properties are both well served. Drop below 50°F and hydration slows noticeably; drop below 40°F and strength development becomes severely retarded; at or below freezing, little strength develops at all. ACI 306 recommends keeping concrete in the 50–70°F range using insulation, heated enclosures, or heated mix water during cold weather. On the other side, hot conditions above 85–90°F create a different set of problems — ACI 305R generally caps placement temperature around 95°F because while early hydration is accelerated, 28-day strength can be reduced if not carefully managed. Concrete should ideally be poured and cured between 50°F (10°C) and 90°F (32°C).
Humidity and Wind
Humidity and wind work together to control surface evaporation rates. Low humidity, high wind, and direct sun all accelerate evaporation from the surface — which sounds helpful for drying but can cause plastic shrinkage cracking and leave behind a weaker, more porous surface layer if curing is not intensified immediately. Countermeasures include fogging, windbreaks, shading, and the immediate application of a curing compound. On the opposite end, high humidity slows drying — which is actually beneficial for the curing reaction — but it can delay coatings and flooring installation significantly.
Water-to-Cement Ratio
The water-to-cement ratio — also expressed as the water-to-cementitious-materials ratio (w/cm) — is one of the most consequential variables in both drying time and final strength. A lower ratio means less water to evaporate, which speeds up drying and produces denser, stronger concrete. A higher water-to-cement ratio results in longer curing time and longer drying times, but makes the mix easier to work with initially. PCA notes that mixes with w/cm below about 0.40 may need external water through fogging or wet curing because internal water may not be sufficient for full hydration.
Concrete Mix Design
Mix design — meaning the ingredients, their proportion, and the cement chemistry involved — directly shapes the curing time outcome. The mix proportions of cement, sand, aggregate, and water determine the consistency of the concrete mix and how long the curing time will run. A higher cement content causes the slab to set and dry faster, while a lower cement content slows the process. Contractors should select the appropriate mix for specific project needs based on these interactions.
Slab Thickness
Slab thickness directly controls how long heat and moisture take to move through the depth of the pour. Thicker slabs hold more mass, which means they retain heat during curing and take longer to cool down — but they also need significantly more time before form removal and before reaching full cure. The deeper the section, the longer the timeline at every stage.
Admixtures and Additives
Admixtures give mix designers the ability to adjust setting behavior without changing the base concrete mix composition. Accelerators — including calcium chloride and non-chloride accelerators — speed up early strength gain, making them useful in cold weather or when early loading is required. Retarders do the opposite, slowing setting to provide more working time in hot weather or for large placements where extended workability is needed. Neither type removes the need for the full curing duration or appropriate temperature control — they shift timing, not the fundamental chemistry.
Concrete Strength and PSI
Strength class and design PSI set the baseline timeline. Residential mixes typically target 3,000–4,000 psi at 28 days and follow the standard curve described above. High-early-strength concretes — produced using Type III cement or higher cement content — can shorten the minimum curing period to around 3 days under suitable conditions, without sacrificing 28-day strength. Fast-setting bagged mixes can reach similar 28-day strength outcomes but allow foot traffic or post-loading within hours — always follow the manufacturer’s data sheet exactly, as these products vary significantly.
| Factor | Effect on Drying / Curing | What to Do |
|---|---|---|
| Temperature (50–70°F) | Ideal range — balanced strength gain | Maintain with insulation or HVAC |
| Temperature below 40°F | Hydration nearly stops | Use heated enclosures, heated mix water |
| Temperature above 90°F | Faster surface dry, risk of reduced 28-day strength | Fog, shade, apply curing compound immediately |
| Low humidity / high wind | Rapid evaporation → plastic shrinkage cracking | Windbreaks, fogging, immediate curing compound |
| High humidity | Slows drying, benefits curing | Dehumidifiers, fans in enclosed spaces |
| Lower w/cm ratio | Faster drying, stronger, denser concrete | Use carefully — may need external water for hydration |
| Higher w/cm ratio | Longer drying and curing time | Reduce excess water; monitor closely |
| Thicker slab | Every stage takes longer | Extend all timelines proportionally |
| Accelerators | Speed up early strength gain | Useful in cold weather or tight timelines |
| Retarders | Slow setting for more work time | Useful in hot weather or large pours |
How Weather Affects Concrete Drying Time
Concrete Drying in Hot Weather
In hot conditions — above 85–90°F — ambient temperature and direct sunlight dramatically accelerate the hydration process and decrease curing time for early-stage strength. High temperatures and wind combine with low humidity to drive surface evaporation far faster than the slab can safely tolerate, increasing the risk of plastic shrinkage cracking and a weaker, more porous surface layer. ACI 305R caps placement temperature at around 95°F for this reason. Countermeasures include fogging, windbreaks, shading, and immediate curing compound application to protect moisture retention. While 1-day strength may appear strong, 28-day strength is at risk if temperature control is not managed carefully throughout the early curing duration.
Concrete Drying in Cold Weather
Cold weather — below 50°F — causes hydration to slow and extend curing time considerably. Below 40°F, strength development is severely retarded, and at freezing temperatures, little strength develops at all. ACI 306 recommends maintaining concrete in the 50–70°F range using insulation, heated enclosures, or heated mix water. Cold-weather concrete mixes and accelerators like calcium chloride or non-chloride accelerators help compensate for cold conditions and support early strength gain when colder temperatures would otherwise extend the project timeline significantly.
Concrete Drying in Humid or Wet Weather
High humidity and wet conditions slow the evaporation process, which extends the drying period — though this is actually good for curing, since moisture retention supports the hydration process. The challenge is that coatings and flooring installation must wait until the slab dries evenly and thoroughly, which can take considerably longer under sustained high humidity. Monitoring and controlling humidity levels — using dehumidifiers and fans in enclosed spaces — and avoiding calendar-based assumptions about readiness is essential. In outdoor settings, wet coverings and curing compounds can help manage moisture retention without relying on ambient conditions that vary day to day.
How to Speed Up Concrete Drying
Property managers and installers working against tight project timelines have several methods available to accelerate the drying process — but each one requires a careful approach to avoid compromising the quality and durability of the finished slab.
Before Pouring Concrete
The fastest gains in drying times come from decisions made before the concrete is ever placed. Start by using the correct amount of water in the concrete mix — too much water is one of the most common reasons a slab takes longer than expected to dry, because there is simply more moisture that needs to evaporate. Reducing water through a lower water-to-cement ratio directly accelerates the drying process by leaving less moisture in the mix from the start. Accelerators — additives mixed into the concrete that speed up the hydration process — can also help the slab set and dry faster, and they are especially useful in colder weather or when project timelines are tight.
After Pouring Concrete
Once the slab has cured, enclose the space as soon as possible to stop it from absorbing any additional moisture from the surrounding environment. The ambient relative humidity of the air and the temperature of the slab itself both control drying just as directly as any other factor. Do not over-trowel or seal the surface too early — doing so blocks pores in the concrete and diminishes moisture evaporation, which only increases drying time. Keep doors and windows closed, keep the HVAC running, and keep fans circulating to maintain consistent ambient conditions throughout the space.
Using Ventilation and Airflow
Proper ventilation is one of the most effective and underused tools for reducing drying time. The goal is to continuously remove evaporating moisture from the air around the slab before it can settle back onto the surface. HVAC systems are particularly well suited to this — in cooling mode, they act like refrigerating dehumidifiers and typically maintain around 50% relative humidity, which is close to ideal for drying concrete. In heating mode, they lower ambient relative humidity by raising air temperature, which also drives evaporation from the slab. Fans help circulate air throughout the space and push moisture-laden air away from the surface.
Using Dehumidifiers
Dehumidifiers are one of the most direct tools for moisture control during the drying phase. Where central systems are not available, portable dehumidifiers can be rented and positioned strategically around the slab to remove moisture from the air and regulate moisture levels throughout the environment. Air movers work alongside dehumidifiers to keep air moving across the surface and through the space, resulting in more consistent drying times. Using vapor barriers beneath the concrete before the pour also prevents ground moisture from rising into the slab from below — a simple moisture control technique that reduces the total moisture load the drying process has to deal with.
Why You Shouldn’t Simply Add More Heat
Heat and ventilation can speed up the drying process, but adding ambient temperature indiscriminately creates its own risks. Applying portable heaters or heating blankets without proper ventilation to remove evaporating moisture traps humidity in the space rather than eliminating it — which can actually slow drying and create inconsistent moisture conditions across the slab. Uneven heat across the surface also introduces the risk of thermal defects and cracks if temperature gradients become too steep during curing. The correct approach is always heat combined with airflow: raise ambient temperature to drive evaporation, then use fans, dehumidifiers, and a closed HVAC system to pull that moisture out of the environment before it can reabsorb into the slab.
How to Tell If Concrete Is Dry Enough
Visual Signs of Dry Concrete
The surface of a concrete slab is nearly always drier than the center of the slab — which is why visual inspection alone tells you almost nothing useful. A slab can look completely dry on top while holding significant moisture content several inches down. Testing is the only way to know for certain whether the slab is genuinely dry enough for flooring, coatings, or any other further work. Relying on appearance risks mold growth, adhesive failures, and surface damage — all of which become expensive problems once flooring or coatings are already down.
Moisture Testing
Concrete moisture testing has been practiced since the 1960s, and today there are several established methods to measure moisture content accurately:
| Test Method | How It Works | Best For |
|---|---|---|
| Moisture Meters | Measure moisture content within the concrete directly — quick and non-destructive | Fast field assessment; no slab damage |
| Plastic Sheet Test | Tape plastic to surface for 24 hours; check for condensation underneath | Simple field check — free to perform |
| RH In-Situ Testing (ASTM F2170) | Sensors inserted at 40% depth (one-side drying) or 20% (two-side drying); measures internal RH | Industry standard for flooring installation readiness |
Moisture tests should be conducted after the concrete has been cured for at least 60 days, or according to the flooring manufacturer’s guidelines — conducting them at the right time avoids costly problems and supports a smooth, successful project completion.
Relative Humidity (RH) Testing
The relative humidity test using in situ probes is the basis for the ASTM F2170 standard. This test uses sensors inserted into the concrete at specific depths to measure the relative humidity of the air trapped in the concrete. For slabs drying on one side only, the sensors are inserted to a depth of 40% of the slab’s thickness. For slabs drying on both sides, the sensors are inserted to a depth of 20% of the slab’s thickness. Once installed in the slab and allowed to equilibrate for 24 hours, you can take repeated moisture readings. Unlike reusable probes, factory-calibrated single-use sensors never need recalibration.
When Is a Concrete Slab Dry Enough for Flooring?
The threshold depends on the product. A common moisture limit specified by many adhesive manufacturers is ≤4% for products which are not designed to be moisture tolerant. Products with high moisture tolerance can accept readings as high as 6%. Always cross-reference the readings against the flooring manufacturer’s guidelines and ensure the slab has been cured for at least 60 days before testing. Staying within acceptable limits is what keeps the project free of costly problems and on track for a smooth, successful project completion.
How to Properly Cure Fresh Concrete
Proper curing is what separates a slab that performs as designed from one that falls short under load. All types of concrete share the same essential components — cement, aggregate, and water — and when water and cement are mixed, a chemical reaction hardens them together. Proper curing keeps the slab moist and at the right temperature long enough for hydration to build full strength. The general rule of thumb is 28 days — or 1 inch of slab thickness per 28 days.
Keep the Concrete Moist
Moisture control is the most direct way to protect hydration and the first thing to get right. Several methods cover this, each with different typical use cases, cost, and labor demands:
| Method | Moisture Control | Typical Use Cases | Cost / Labor |
|---|---|---|---|
| Ponding / Immersion | Excellent — continuous water | Pavements, small slabs, precast elements | High labor and water use; best for small/controlled areas |
| Sprinkling / Fogging | Good if kept continuous | Fresh slabs in hot/dry conditions | Needs supervision and ample water — intermittent cycles risk crazing |
| Wet Coverings (burlap, mats) | Very good when kept saturated | Slabs, vertical surfaces, edges | Inexpensive materials; labor needed to keep coverings wet |
| Curing Compounds | Good when properly applied | Large slabs, pavements, structural elements | Low labor after application; may affect future coatings/adhesives |
| Plastic Sheeting | Good moisture retention | Slabs, simple shapes, over wet coverings | Very cost-effective; can cause patchy discoloration |
| Curing Blankets | Indirect — supports temperature control | Cold-weather slabs, structural elements | Higher material cost; reduces need for heated enclosures |
Sources: ACI 308R Guide to External Curing of Concrete; PCA Design and Control of Concrete Mixtures.
Cover the Concrete
Covering the slab protects moisture retention and reduces the need for active wetting. Plastic sheeting is the most cost-effective option for slabs and simple shapes, and it works well laid directly over wet coverings to slow evaporation. Curing compounds — when properly applied — provide good moisture control across large slabs, pavements, and structural elements with low labor after application. Membrane-forming curing compounds that comply with ASTM C309 are typically sprayed at 150–200 sq ft per gallon and should maintain surface relative humidity above 80% for at least 7 days, per ACI 308R. The critical caveat: some curing compounds are incompatible with later adhesives, flooring, and coatings — always verify compatibility before applying if flooring or surface coatings are planned.
Control Temperature
Temperature control runs parallel to moisture control throughout the curing period. Curing blankets address this directly — they support temperature control on cold-weather slabs and structural elements where heat retention matters for keeping hydration active. The trade-off is higher material cost compared to other coverings, and they reduce but do not eliminate the need for heated enclosures in severe cold. Keeping the slab within the right temperature window — combined with reliable moisture control — is what allows the chemical reaction to run its full course and the slab to become fully cured by 28 days as designed.
Protect Concrete From Traffic and Impact
No curing method works if the slab takes traffic or impact before it has the full strength to handle it. The timeframe for protection maps directly to the curing period: keep foot traffic off until at least 24–48 hours post-pour, vehicle traffic off until 7 days, and hold heavy loads until 28 days when the slab is fully cured. Weather, mix design, slab thickness, and actual site conditions all affect where exactly the slab sits within that timeframe — which is why moisture control, temperature, and proper testing need to run in parallel, not as afterthoughts once the surface looks ready.
What Happens If Concrete Doesn’t Cure Properly?
Skipping or shortcutting the curing process does not just slow things down — it permanently changes what the slab becomes. Four failure modes show up repeatedly when moist curing is interrupted, rushed, or ignored entirely, and each one compounds the others once the slab is in service.
Cracking
Rapid evaporation and shrinkage at early ages pull the surface in opposite directions before the mix has developed adequate tensile strength to resist that pull — the result is plastic shrinkage cracking and surface crazing that runs across the top layer. Thermal gradients make this worse: a hot surface over a cool interior, or freezing conditions near the surface, create uneven stress distributions that the young mix simply cannot absorb cleanly.
Dusting / Weak Surface
Early drying prevents full hydration of the top layer of cement paste. When the surface dries out before the chemistry has run its course, what remains is a weak, powdery surface that wears quickly under even light traffic — exactly the kind of deterioration that looks minor at first but accelerates fast once the slab goes into use.
Reduced Strength and Durability
Once internal relative humidity drops to around 80%, strength development effectively stops — and if moist curing resumes later, the original potential strength may not fully recover. Interrupted curing also increases permeability, which lets water and salts penetrate more easily and accelerates long-term deterioration from within.
Scaling and Freeze-Thaw Damage
NRMCA’s CIP 11 notes that insufficient curing — combined with a lack of air entrainment — raises the slab’s susceptibility to scaling under freeze-thaw cycles and deicer exposure. PCA recommends curing for the full period needed to develop adequate surface strength, followed by an air-drying period of about 1–3 months before the slab faces any deicer exposure at all.
Concrete Drying Time by Application
These timelines reflect common practice across the industry — not fixed guarantees. Actual performance depends on project-specific variables including mix design, site conditions, temperature, and slab thickness. Use these ranges as planning benchmarks, not hard ceilings.
🏗️ Concrete Slabs
- Walkable: 24–48 hours
- Light service: 7–14 days
- Design strength: ~28 days
- Form removal: 1–3 days
🚗 Driveways
- Walkable: 24–48 hours
- Light service: 7–14 days
- Passenger cars: ~7 days
- Heavy loads: 28 days
🚶 Sidewalks & Walkways
- Walkable: 24–48 hours
- Light service: 7–14 days
- Full design strength: 28 days
🏛️ Foundations
- Form removal: 1–3 days
- Backfill/loading: verified strength only
- Design strength: 28 days
🧱 Concrete Blocks & Masonry
- Handling: verified strength
- Design strength: 28 days
- Loading: per design
🪟 Floors Before Flooring
- Start testing: 60 days minimum
- RH threshold: ≤4% (standard)
- High tolerance: up to 6%
| Application | Walkable | Light Service | Full Strength / Design Use | Special Notes |
|---|---|---|---|---|
| Concrete Slabs | 24–48 hrs | 7–14 days | ~28 days | Form removal 1–3 days; loading decisions need verified strength |
| Driveways | 24–48 hrs | 7–14 days | Passenger cars ~7 days; heavy loads 28 days | Never drive on before 7 days |
| Sidewalks & Walkways | 24–48 hrs | 7–14 days | 28 days | Common practice; actual times vary by conditions |
| Foundations | — | — | 28 days (verify with testing) | Backfill only after verified strength; calendar date alone is insufficient |
| Concrete Blocks & Masonry | — | — | 28 days | Handle and load only after verified strength; estimate your project |
| Floors Before Flooring | Surface dry: 24–48 hrs | — | Test after 60 days; ≤4% RH threshold | Surface dryness is NOT sufficient — always test internal moisture |
4 Common Myths About Concrete Drying
Understanding the technical aspects of concrete drying matters — but so does clearing out the myths and misconceptions that quietly drive mistakes in concrete handling on real projects. These are the four that cause the most repeated damage.
Frequently Asked Questions
How long does concrete take to dry?
Concrete drying is not a single event — it is a process that runs on two parallel tracks. The surface becomes walkable within 24–48 hours under normal conditions, but actual drying — the evaporation of internal moisture — can take months. The general rule of thumb is 28 days per 1 inch of slab thickness, and even then, internal moisture content may remain elevated enough to affect flooring or coatings. The surface reaching design strength at 28 days is not the same as the slab being fully dry for moisture-sensitive installation.
How long does concrete take to cure?
Most standard residential mixes reach about 70% of design strength at 7 days and approximately 100% at 28 days under proper curing conditions. The American Concrete Institute (ACI 308R) sets the minimum curing period at 7 days at or above 40°F for normal concrete — but the full 28-day window is what the industry uses as the standard reference age for acceptance testing and specification language. Concrete continues to gain strength beyond 28 days if moisture and temperature conditions allow.
Can you walk on concrete after 24 hours?
Technically yes — but carefully. Most standard mixes are walkable after 24 hours, though waiting the full 48 hours significantly reduces the risk of scuffing, imprinting, or surface damage. At 24 hours, the slab has reached its final set and is no longer workable, but it is still gaining strength internally and remains vulnerable to surface defects from dragging heavy objects or undue stress. Light foot traffic is acceptable; anything heavier should wait.
How long before you can drive on concrete?
Passenger vehicles should wait at least 7 days before driving on a concrete driveway — by that point the slab has reached approximately 60–70% of its design compressive strength, which is sufficient for normal cars under typical loads. Heavier vehicles — trucks, moving vans, and RVs — should wait until the full 28 days of design strength has been reached. Ambient temperature, slab thickness, and mix design all affect this window, so always treat 7 days as a minimum, not a guarantee.
How long does a concrete slab take to dry?
It depends on slab thickness. A 4-inch slab typically reaches walk-on condition in about 24 hours and full cure at 28 days. A 6-inch slab may need 24–36 hours before foot traffic and 28–35 days for full cure. Slabs 8 inches or thicker may require 7–10 days before safe form removal and 35–45 days for full internal cure. Thicker slabs hold moisture and heat longer, which extends every stage of the curing period. Use our Concrete Slab Calculator to estimate your project materials.
Does concrete dry faster in hot weather?
Hot conditions accelerate surface evaporation and early hydration — which can produce higher 1-day strength — but excessive heat creates its own problems. When temperatures rise above 85–90°F, rapid water evaporation pulls moisture from the slab faster than the hydration chemistry can safely tolerate, risking plastic shrinkage cracking, a weaker and more porous surface layer, and reduced 28-day strength if moisture retention is not actively managed. ACI 305R caps placement temperature at around 95°F. Hot weather without proper countermeasures does not accelerate strength — it undermines it.
Can concrete dry in cold weather?
Yes — with the right precautions. Cold weather below 50°F slows hydration significantly, and below 40°F, strength development is severely retarded. But it is not impossible to pour and cure concrete in colder temperatures. Using hot water in the mix, heated enclosures, insulation, or accelerators like calcium chloride keeps the curing reaction active. ACI 306 recommends holding ambient temperature in the 50–70°F range throughout the curing period — failure to do so can extend the project timeline significantly and produce a slab that tests short of its design strength.
How can I make concrete dry faster?
Several approaches work — but all require careful management to avoid compromising quality. Before the pour: use a lower water-to-cement ratio to reduce the total moisture load, and consider accelerators to speed up hydration. After the pour: enclose the space, keep doors and windows closed, run the HVAC, and use fans to continuously circulate air and remove evaporating moisture. Dehumidifiers are one of the most direct tools — especially in enclosed spaces — and vapor barriers beneath the slab reduce ground moisture rising from below. The correct formula is always heat plus airflow: raise ambient temperature to drive evaporation, then remove that moisture from the air before it can reabsorb into the slab.
How do you know when concrete is dry?
Visual inspection alone is not reliable — the surface of a concrete slab is nearly always drier than the center. The only dependable answer comes from testing. Moisture meters provide a quick assessment. Plastic sheet tests — tape a sheet of plastic to the surface for 24 hours and check for condensation — offer a simple field check. For flooring and coatings, the industry standard is relative humidity (RH) testing using in situ probes per ASTM F2170, which measures the relative humidity of air trapped inside the slab at the correct depth — 40% of slab thickness for slabs drying on one side, 20% for slabs drying on both sides. Most flooring and adhesive manufacturers specify a moisture tolerance threshold of ≤4% or as high as 6% for high moisture tolerance products.
Is concrete fully cured after 28 days?
28 days is the standard reference age for design strength — the point at which residential mixes targeting 3,000–4,000 psi are expected to have reached their full compressive strength under proper curing conditions. It is the basis for acceptance testing and specification language across the industry, per PCA, ACI 301, and NRMCA CIP 11. However, concrete continues to gain strength beyond 28 days if moisture and temperature conditions allow. And for flooring systems and coatings, 28 days is the starting point — not the sign-off. Internal moisture condition must still be tested and confirmed within acceptable limits before any moisture-sensitive installation proceeds.